Wednesday, May 18, 2011

Nightstand


After buying some cabinet hardware, I had to use them right away.  I have been seeing so many beautiful Ikea Rast hacks that I had to do one myself.  The Rast is only $30 dollars and it takes a little money to decorate it as well.   So inexpensive for something that can be made so cute and useful.  I already had some paint from my last projects, so I used that for the meantime.   Eventually the plan is to paint it all white and put some molding and more feminine handles…can’t wait. The lamp is from Home Goods and the candle holders from Crate & Barrel.


Sunday, May 15, 2011

Office Chair


I am in desperate need for a new office chair.  Need something with good lumbar support but that still looks pretty.  I would like something in white.  Here are some contenders:

Friday, May 13, 2011

Ikea Wall Shelf Turned Console Table


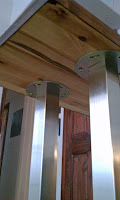
Materials Used: (1) Ikea Ekby Statlig wall shelf 47 7/8x11”, (4) Ikea Vika Moliden legs, (16) screws, Minwax Wood Stain, Minwax Polycrylic, (1) 2” synthetic brush, and a power drill.

Steps:

First, I screwed on the Vika Moliden legs to the long Ekby Statlig shelf using a power drill.  I randomly chose a spot to add the legs but made sure it was placed evenly between both ends.  I didn’t, however, use the screws provided with the legs because the screws where just a little longer than the thickness of the wood; instead, I bought shorter screws (less than an inch) for a couple of bucks at Home Depot.

Once the table was assembled, I stained the wood with Minwax Wood Stain in English Chestnut using a 3” synthetic brush (as shown below).  I didn’t sand or prep the wood beforehand with the exception of quick clean with a wet cloth to make sure no dust or other particles were on it.   I only did one coat but if you want to add more coats, it’s probably a good idea to allow it to dry for an hour between coats.

After staining the wood, I cleaned the brush thoroughly to later use for adding polycrylic.  If you want to reuse the brush, it is best to clean it soon after using to avoid the brush from drying up clumpy.

I let it dry over night then added only one coat of Minwax Polycrylic because I didn’t want the table to be too shiny.  Several hours later it was dry and ready to go.

Painting Ikea Malm Bed


I was tired of my old malm birch veneer bed.  After some years, the birch turned into an ugly yellow (from direct sunlight…oops) and had some chips here and there.  I want to get a new bed, to upgrade in size, but can’t really decide on one yet.  For the mean time, I decided to play with my existing bed and see what I can do.  I saw a great tutorial on painting Ikea furniture here and used that as my guide.   


The only step I added was using plaster (since I had some around) to fix some of my dings on the headboard.  Then I primed the bed with two coats.  I waited maybe half an hour between coats.
After priming the bed, I was ready to paint it into an awesome new non-ikea-color but didn’t have the guts to do it in the end.  Instead, I painted the bed white to match my white malm dresser.  The tricky part here was matching Ikea’s white paint.  I found that Behr’s off white paint came pretty close to my dresser but there might be better choices too.  I used less than a quart of paint.

So far, I am happy with the results.